

How it works
From the first mailbox to the first safe test.
MAILTIG setup is six steps: connect a mailbox you control, publish DNS, import contacts you are allowed to email, design a sequence, pass preflight, then read replies in context. It does not hide a charge or a manual task behind an automation claim.
Step 1
Connect a sending mailbox
Gmail and Microsoft 365 use OAuth. Any other mailbox can use SMTP, with optional IMAP so replies come back. SendGrid, Mailgun and Amazon SES are available on Business and Agency. OAuth buttons stay off until the operator configures client IDs.
Connect Gmail and Microsoft 365 with OAuth, any SMTP mailbox (with optional IMAP for replies), and SendGrid, Mailgun or Amazon SES on plans that include high-volume senders.
Details →MAILTIG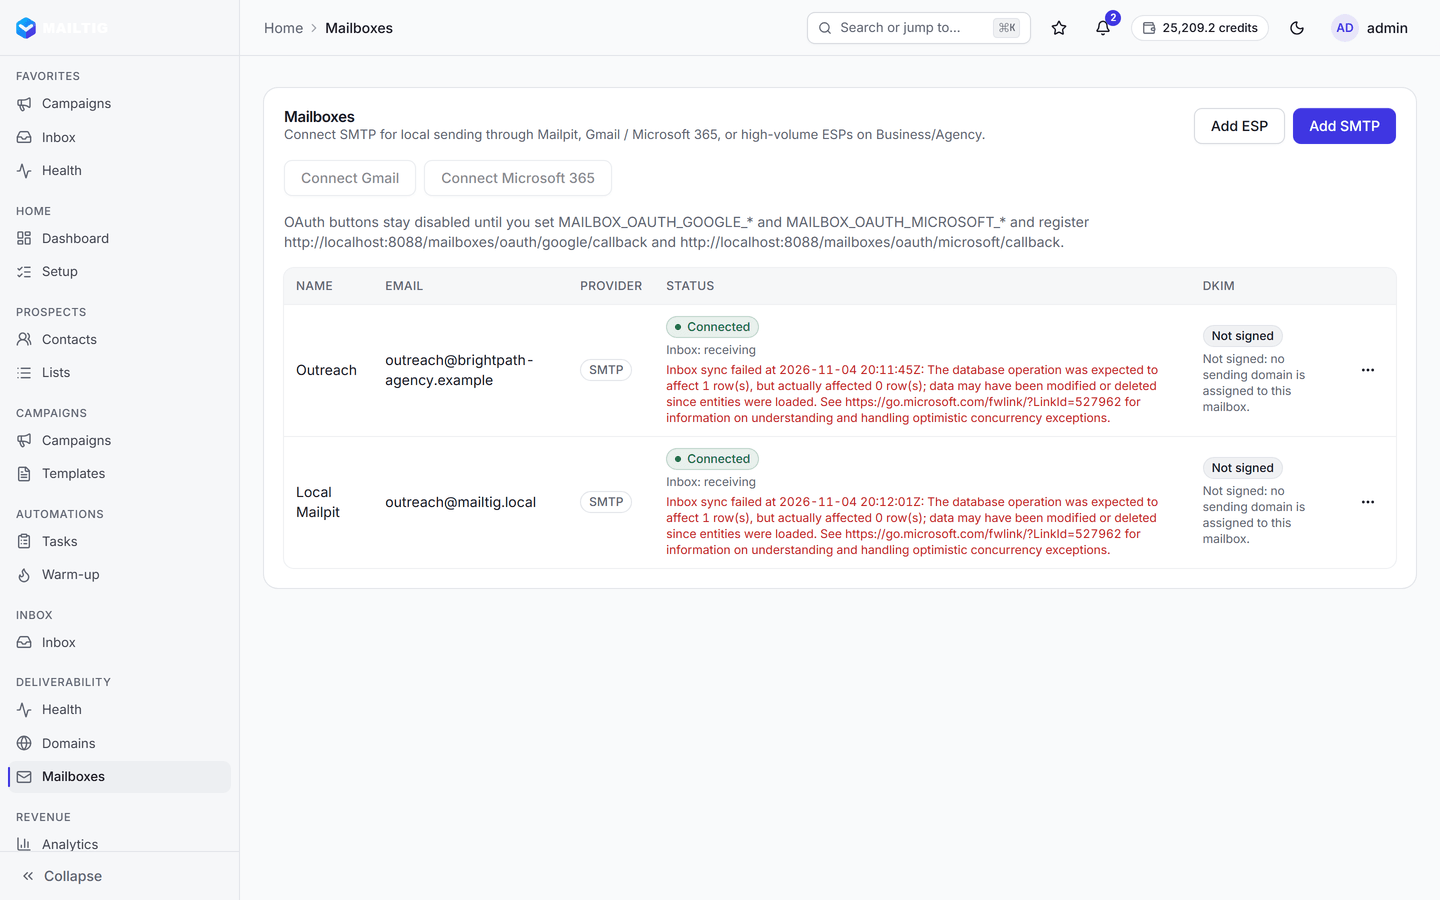
Mailboxes: connected senders, daily limits and connection health. · Product v1.0 · captured 4 Nov 2026
Step 2
Check the sending domain
Add the domain. MAILTIG generates the verification, SPF, DKIM and DMARC records. Publish them, then run the check. A pass means the records resolve. It does not mean mail will land in the inbox.
Add a sending domain and MAILTIG generates the verification, SPF, DKIM and DMARC records to publish, then checks them by DNS lookup on demand and hourly until they pass.
Details →MAILTIG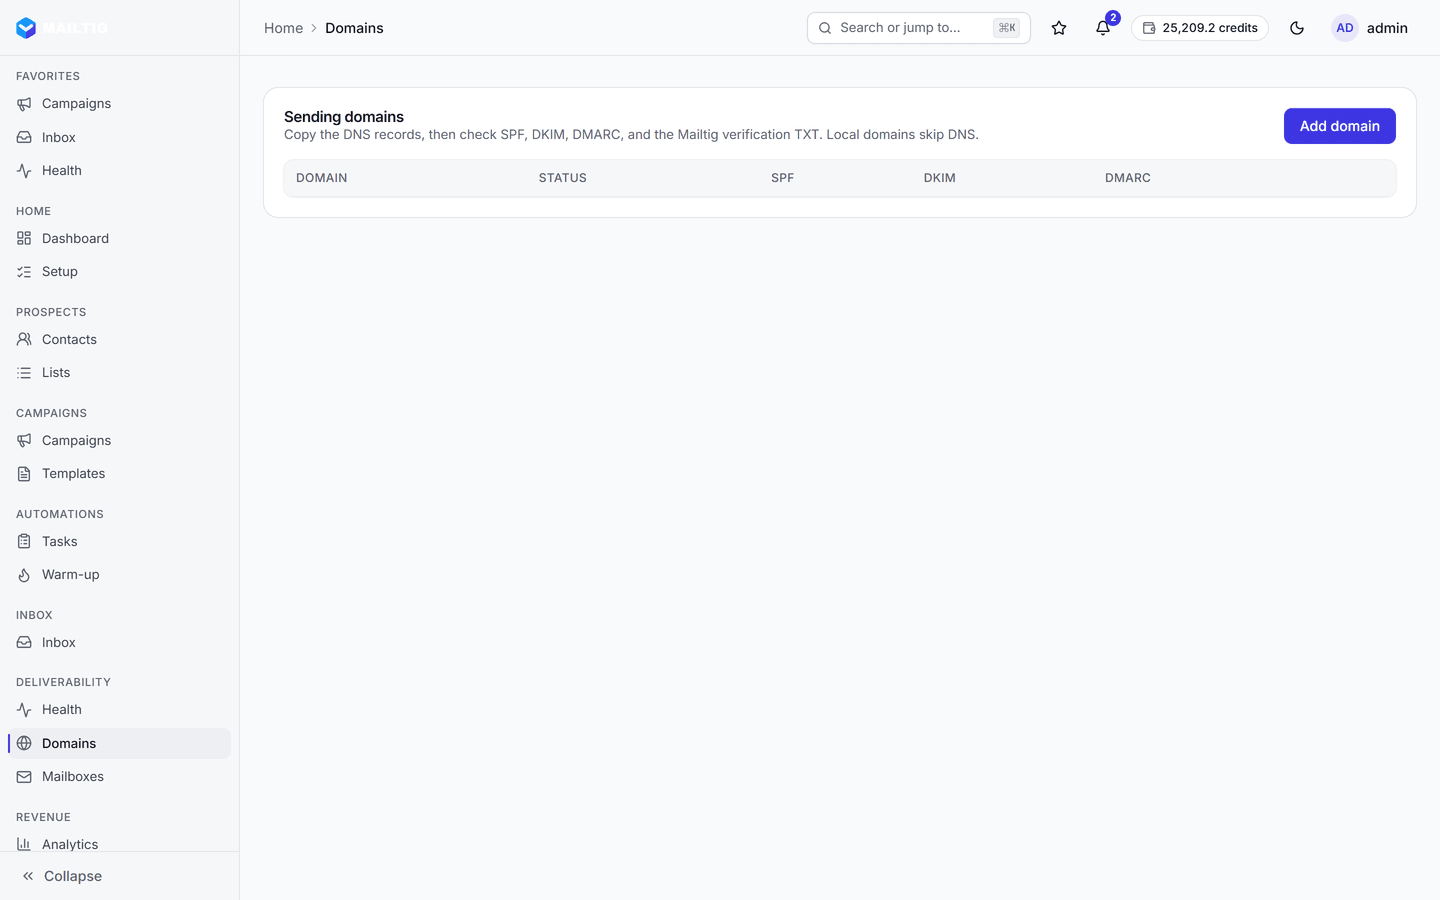
Sending domains: SPF, DKIM and DMARC checks with the exact records to publish. · Product v1.0 · captured 4 Nov 2026
Step 3
Import qualified contacts
CSV import with custom fields, or the API. Verify addresses if you want. MAILTIG does not sell or include a contact list. You bring the people you are allowed to email.
Import contacts from CSV with custom fields, build lists and segments, verify addresses, keep a timeline of every send, open, click, reply and note, and export or erase a contact's data on request.
Details →MAILTIG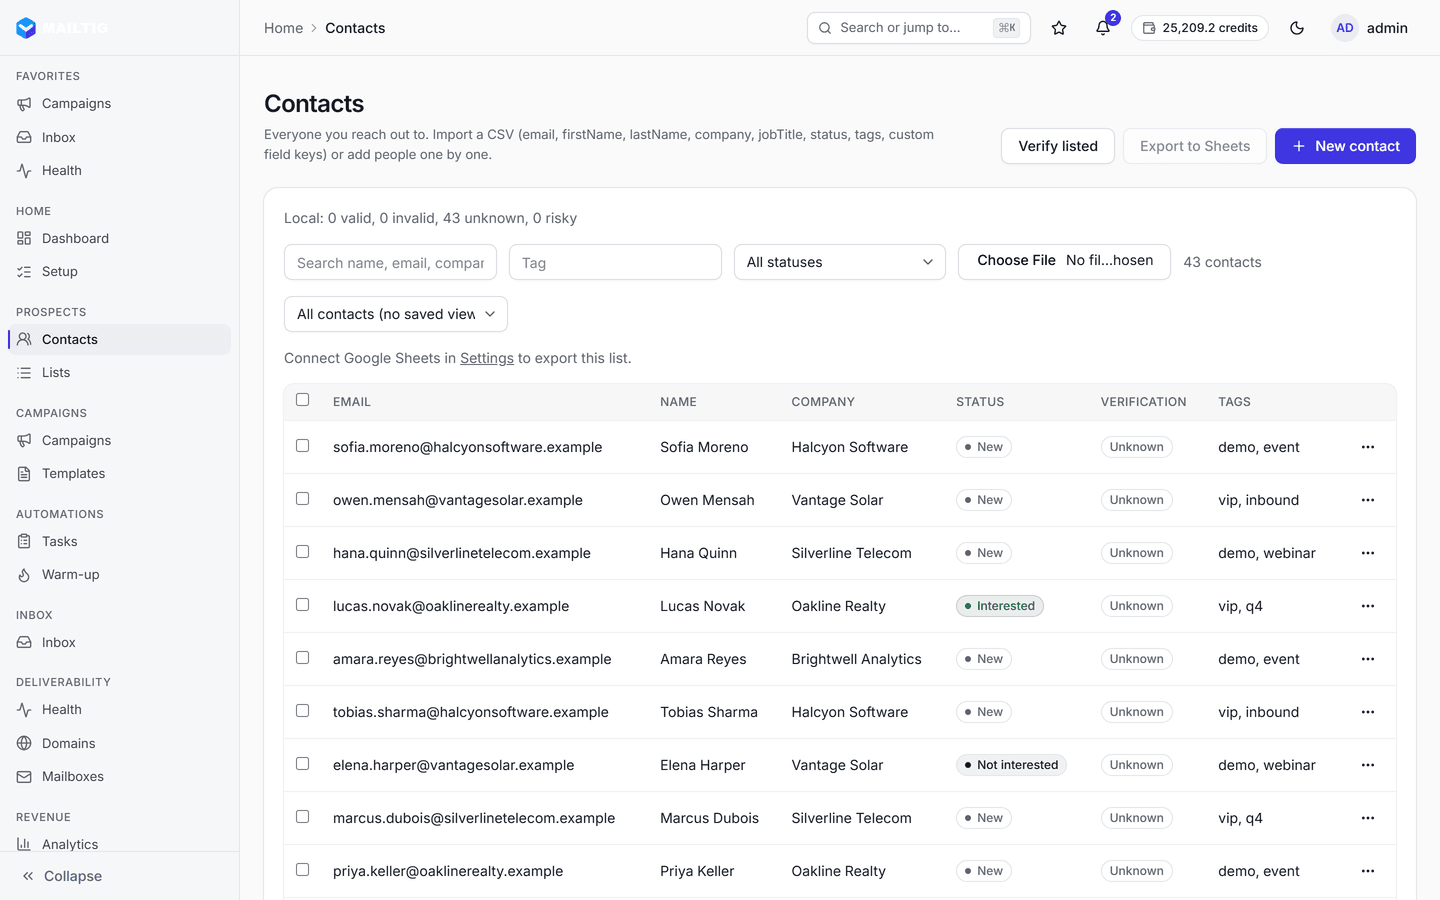
Contacts: the people you reach out to, with verification state and tags. · Product v1.0 · captured 4 Nov 2026
Step 4
Design the sequence
Steps, waits, open/click/reply conditions, a reply branch, optional A/B, send windows and a daily cap. LinkedIn, SMS, call and WhatsApp steps become tasks for a person. Email is the only channel MAILTIG sends.
Build sequences with wait times, open, click and reply conditions, reply branches, A/B variants with a holdout, send windows in a chosen time zone and a daily cap per campaign.
Details →MAILTIG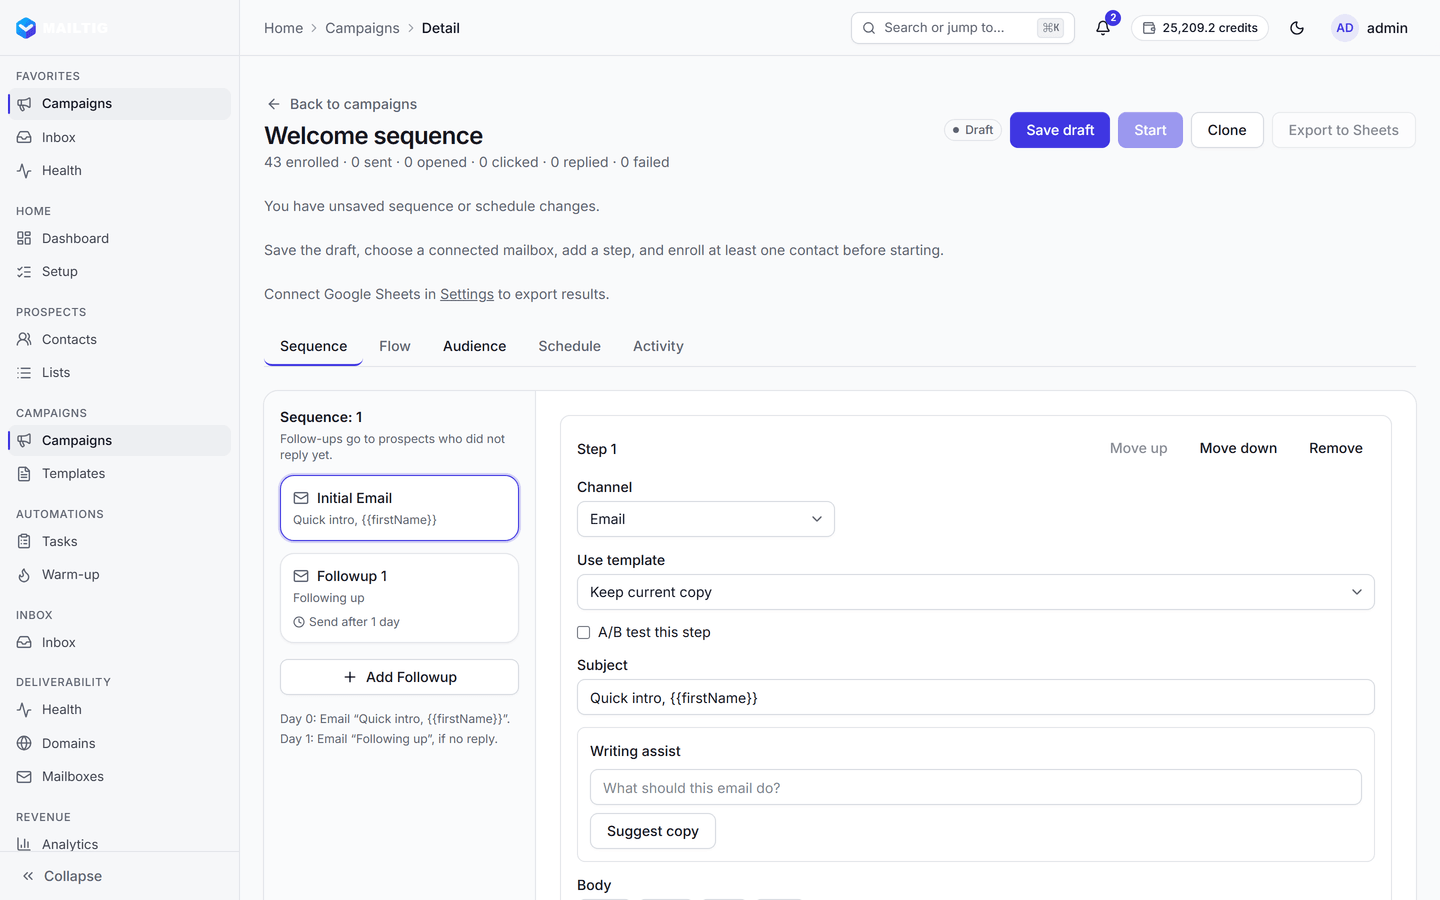
Campaign detail: steps, timing, prospects and results for a single sequence. · Product v1.0 · captured 4 Nov 2026
Step 5
Pass preflight, then start
Preflight lists blockers: connected mailboxes, DKIM mode, postal address, audience, credits and schedule. A workspace can require approval before any campaign starts. After 20 sends, a 5% bounce rate pauses the campaign.
Before a campaign starts, preflight lists blockers and warnings: connected mailboxes, DKIM mode, CAN-SPAM address, audience, credits and schedule. A workspace can require approval before any campaign starts.
Details →MAILTIG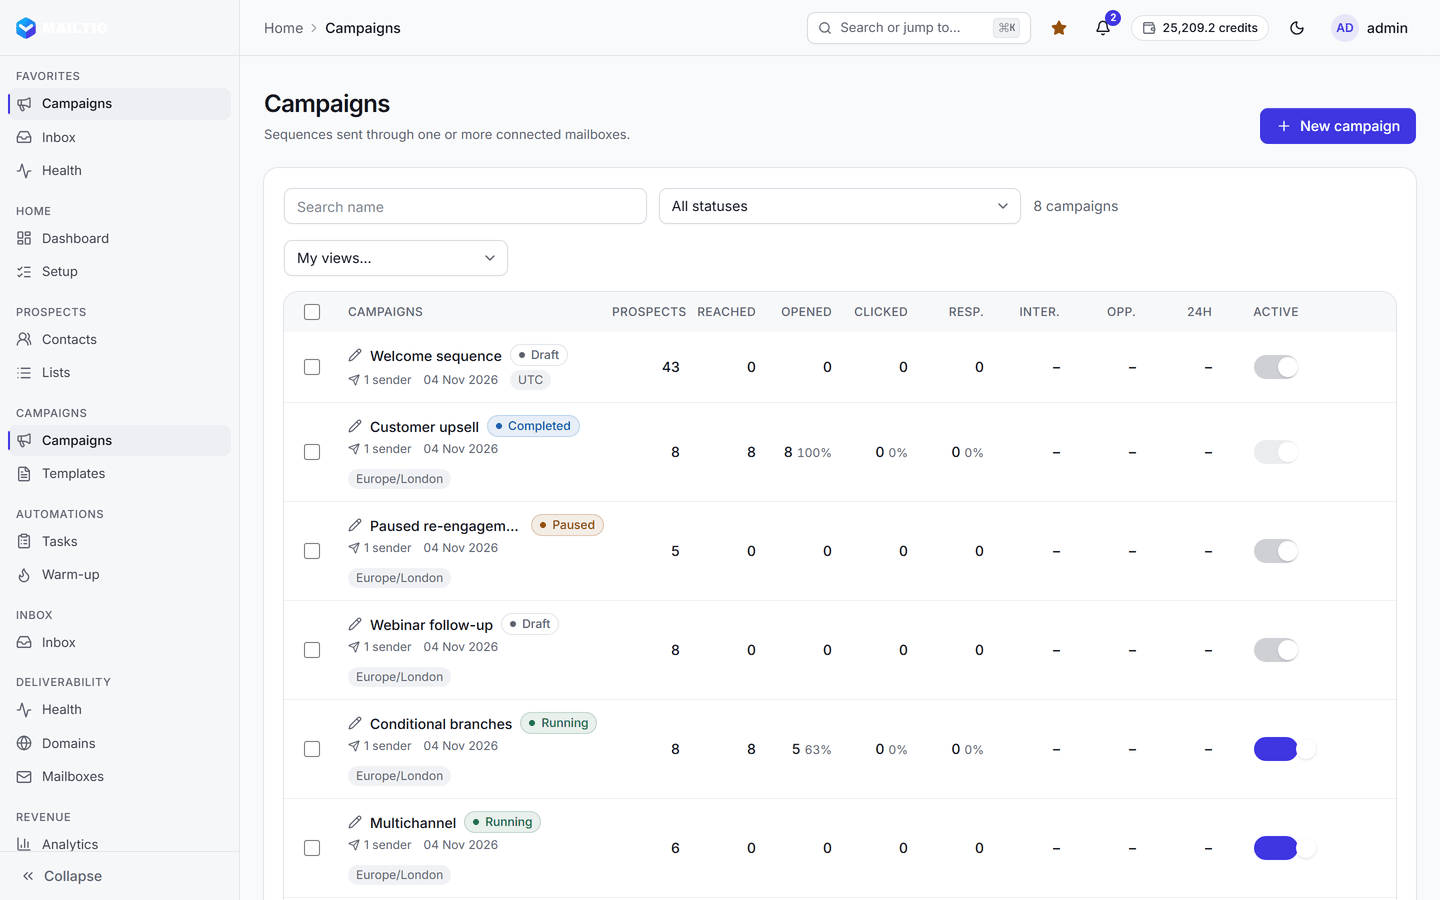
Campaigns: every sequence with its status and funnel counts in one table. · Product v1.0 · captured 4 Nov 2026
Step 6
Read replies in context
Human replies stop the sequence, land in the unified inbox, and keep the contact, campaign step and history beside the thread. Then measure what happened, with definitions attached.
Replies from every connected mailbox arrive in one inbox, matched to the campaign and contact by message headers, with bounces and auto-replies detected and sentiment classified.
Details →MAILTIG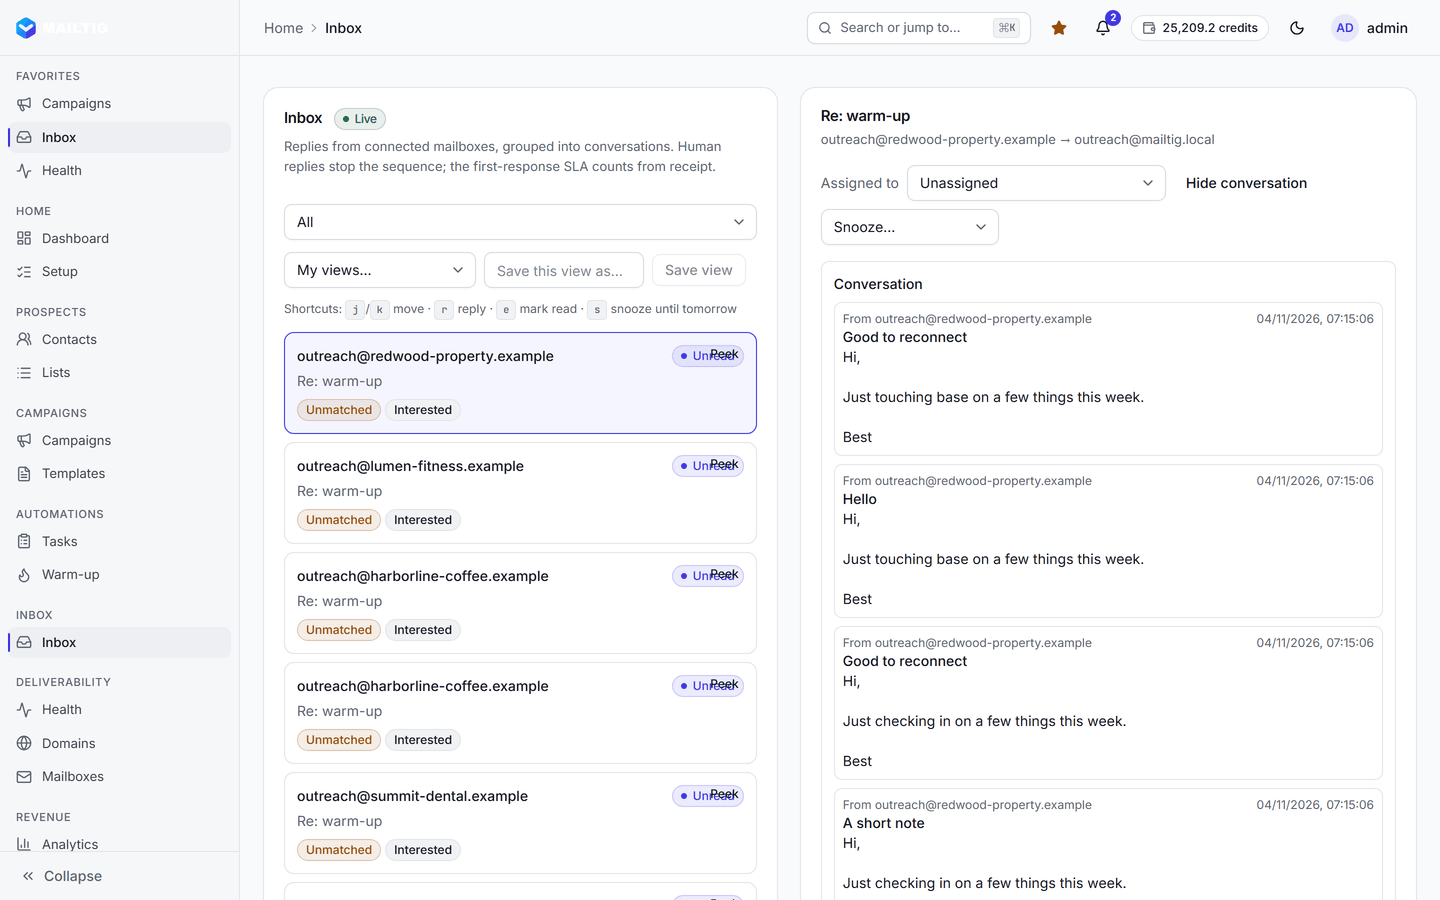
Unified inbox: replies from every connected mailbox, grouped into conversations. · Product v1.0 · captured 4 Nov 2026


Before the first campaign
A checklist, not a promise.
You need
- A mailbox you control, and permission to send from it
- A sending domain you can publish DNS records on
- Contacts you are allowed to email, with a way to unsubscribe
- A postal address for the CAN-SPAM footer
- Credits: 250 trial credits on a new workspace, then the plan allowance
Provider limits still apply
Ready to connect the first mailbox?
Creating a workspace is free. You will sign in on the existing MAILTIG application. This site never asks for a password.